THE GREAT PIANO PROJECT
Phase 0 -- The Idea
Sometimes I am self-driven to do some weird stuff. I have no idea why. Once I get an
idea in my head, it stays there for a long time. This story starts with
my wife, then girl friend, back in 1994. She had a few aquariums including a
fairly big one for 2 huge Oscars(a fish that grows big and feeds on goldfish).
I fell in love with aquariums. I saw some program on the discovery channel that
showed an old telephone booth made into a large aquarium and I figured I
could do that. One day while walking home from classes, I saw a TV on the curb.
That is when the drive really kicked in, "Make an aquarium out of a TV."
The TV I saw was in bad shape. In the summer of 1995 one of my fraternity brothers
asked for help in putting an old, broken, very heavy TV at his girl friend's apartment onto the curb. I asked if I could
have it and he tried to charge me $75 for it. Yea, right. We agreed if I helped
get it out of her living room I could have it.
Telequarium, still in the DChi house at UNI |
I worked on it for about 6 months. A majority of the work was actually done on
the lawn of my fraternity's house and I stored it in my station wagon, because
it was just to heavy too try to carry it into the basement. Once I had completely
gutted it, it was moved inside. I put hinges on the lid, so it could be opened,
and glued electronic wiring(gutted from the TV) along the back cover to act as the
aquarium's background. I installed a fluorescent light and used the TV's on/off
switch to operate it. Someone gave me an old radio and I hooked that up to the volume
and speaker of the TV. I was working on a small budget as you can imagine, so
I decided to actually assemble the aquarium from scratch. I purchased the raw
glass and silicon and went to work. After it was done, someone helped me move
it upstairs to the main room in the house. Total price came to about $100.
3 months later it was leaking. I drained the tank and resealed it learning from
my previous mistakes. When I moved out of the fraternity house, I left it there.
It was just too heavy to move and haul. It is still there today, except with a
manufactured tank installed after another leaking incident. Making the tank myself
and making it part of the TV were my biggest mistakes. Had I made the tank to be
removed, I may have been able to move it and repair it properly.
After completing the TV, I was ready for my next challenge to use what I learned.
In the fraternity we had an old beat up upright piano. It didn't take long for
my drive to redirect itself. I would have to wait. That piano was too beat up, and
there was no room to work on it.
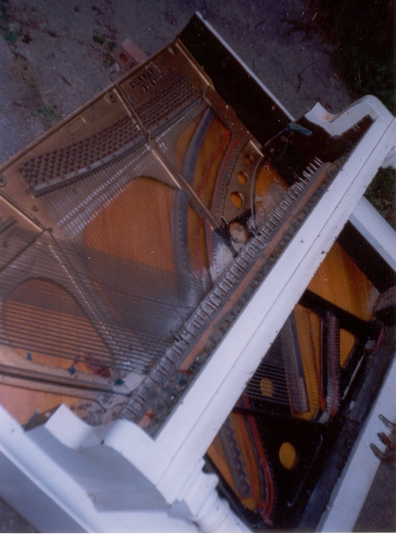
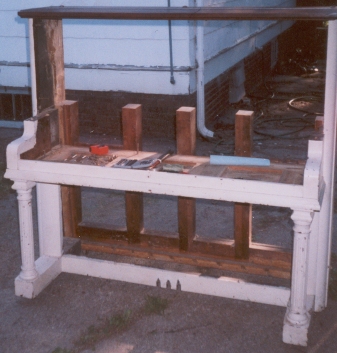
Piano, partially gutted, laying on its back |
Phase 1 -- The Remodeling
I moved to Des Moines in 1996 and started looking for free pianos. While in college
I saw several in the want-ads free for the hauling. I still had not found one by the
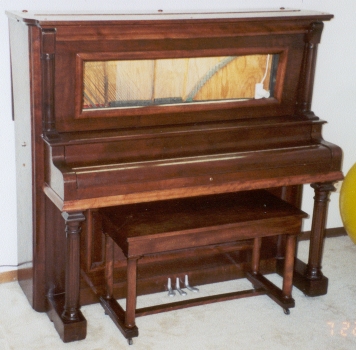
summer of 1997 and grew impatient. I found one for $75 dollars in Johnston, a suburb of
Des Moines. I visited the owner, a very dear, old lady the next day. The lady was
rather crafty. She had all kinds of nicknacks around her house that she had made. She
had also painted the piano. But it was in sound shape, with a only a few keys not working.
I tried to drive down the price but she was stubborn.
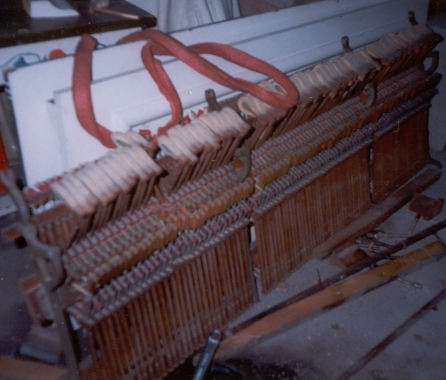
Hammer unit leaned up against the removed front panels |
I had found a freelance moving company
to move it for me for another $75. I took a day off from work to move the thing.
I met the movers early in the morning, but bad luck came into play. They said
they would not move it after seeing that it was an old upright. They stated that
their insurance would not cover them on it--injury to themselves or the piano. I argued
that I had them booked for a week and their secretary had told me uprights were no
problem. Without an apology or even looking back they left. I started frantically
calling movers again, since this was the only day I could take off for this. Through
a Delta Chi alumnus I knew who worked at Critchet's Piano, I found a guy who would do it that
afternoon. Incidentally, there is a signature of a Critchet that tuned it in 1934 on the sound board.

The metal string holder (non-brass) with cut up pieces of the sound board |
So, I hung out with the old lady for the few hours I had to wait. From
her I learned of the piano's history. She said that she had save it from the curb in Des
Moines in the 1940's. Her husband thought it would be nice for their young children, and she
knew how to play. One of her daughters became a wonderful player. She married and moved
to Pennsylvania, taking the piano with her. Sometime in the 1970's the daughter moved back
to Iowa after a divorce. Once again the piano was slated for the curb. The old lady
told me one should never throw out a piano. She hired a moving company to ship it
from Pennsylvania back to Iowa to her house in Johnston. She then painted the now very out-of-tuned instrument white
with decoration, never to be played again till I took it.
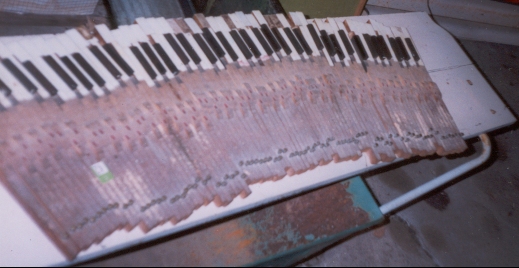
Ivory keys laying on the removed top of the piano |
Having no garage I moved it to my future mother-in-law's place. I started taking it apart
marveling at its design. I purposely kept everything I could in good shape, because I may
need it later. As I worked on it, it made lots of noise. Dogs would bark in the neighborhood.
The noises ranged from beautiful calm vibrations to angry violent reverbs. I considered taping it
and selling it titled, "Death of a Piano." I found a 1943 dime and even a recent mouse nest, who's owner had
a fetish with the color blue (cellophane, yarn, paper, buttons, everything in the nest was blue).
Then I hit rock bottom. A 12x12 chunk of wood running along
the top, the sound board, the metal string holder, and the rest of the piano was
all glued into one piece. I could see no nice alternative to getting the parts out. So I
walked away for a few months.

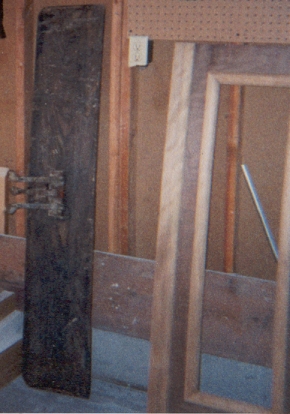
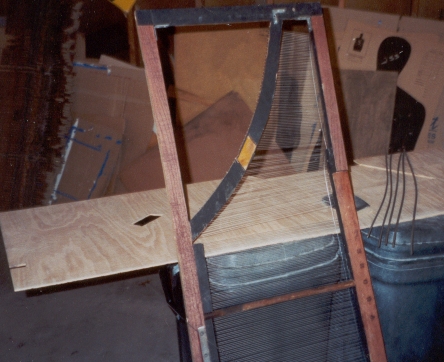
As gutted as it gets, notice the removable top has already been stripped and stained |
In October of 1997, Des Moines was hit with a large snow storm dumping 14 inches of snow
in 1 day. This knocked down several large limbs into my future mother-in-law's yard. She and
my future wife were without electricity for 1 week which regrettably killed our Oscars. One night
I rented a chainsaw and cleaned up their yard. I was just finishing when I stopped and looked
at the chainsaw and looked at the garage and then back again. No more Mr. Nice Guy!
I took the chainsaw and bit into the piano. It turned dark early and I had to retire without
any head way being made. The soundboard unit would not budge. It grew cold and I left the
piano for the winter.

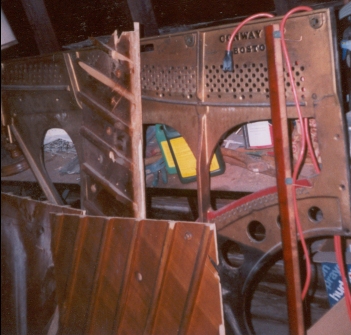
From the back side after the shelving and support were installed |
I did not return to the piano until late 1998. Once again I rented a chainsaw and went
to it during daylight ours where I could see more. I had cut everywhere I could
without damaging the needed parts of the piano. I went and purchased a crowbar to use.
Maybe it just need a good budge. The crowbar would not budge it for the longest time.
Out of desperation I gave it one last push as I was prying and there came a loud
crack and I almost fell to the ground. Immediately after the loud noise, all the strings
rang out on the piano and the dogs began barking. I had finally loosed the huge piece
that needed to come out. One problem though, it was too heavy to lift out. I would need
an engine hoist or something. Then I noticed that the strings and their tighteners
played a major roll in holding several parts of the big piece together. I went to the task of
removing the strings, saving the thick bass ones for later. After that I was able to totally
finish gutting the piano and I took a break for the winter.
Left- the bottom of the piano with corroded foot pedals, right- front panel with center removed for fish viewing, notice the 2-tone look |
I returned to work on the piano the next spring(1999). I started the task of stripping
back the paint and sanding the pieces. I was happy to discover that the piano had
Mahogany veneer. I am still unsure about the majority of the piano, but I am guessing
Walnut. That summer I was married and we moved into a home with a large 2 stall
garage. This gave me a convenient place to work on the piano and work I did. I used
3 layers of Bix Tuff-Job Remover to take off the paint and remove the stain. Then I
sanded each part till smooth with very fine sand paper, all by hand. I followed up
by using a rag to apply 2 coats of Minwax Red Mahogany Stain and 2 coats of Minwax
Clear Gloss Polyurethane. I also used a cheap black house/outdoor paint to line and waterproof the area for the tank.
I used simple chrome paint for the pedals and was able to get them to shine, again. The kids in the neighborhood would come visit me to see the work in
progress. The typical response was, "Cool, but why?"

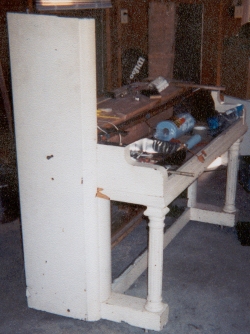
The piano served as a work bench at times |
I also fixed the wheels and strengthened some parts. A shelf was added and supported
to hold the future heavy aquarium. The shelf board and support along with a few screws
and the electronics were the only pieces added. Everything else was taken from the piano.
Did I say electronics? Yes, I added a plugin and several outlets for phase 2 and phase 3.
A couple of the outlets are operated by switches hooked up to 2 of the pedals.

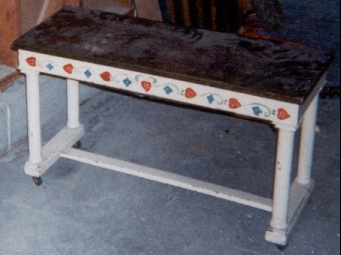
The bench untouched |
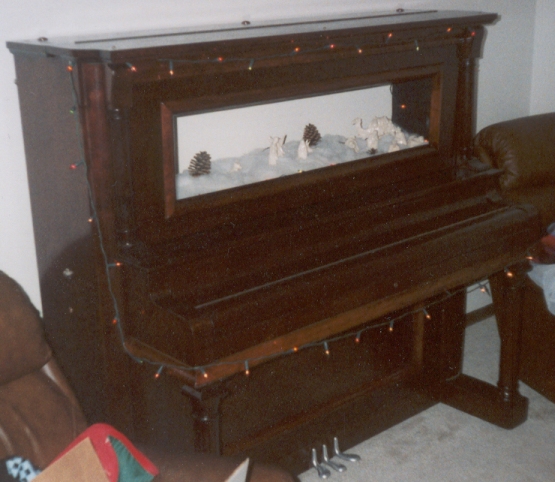
With the help of one of my friends, we attempted to move the finished piano into my basement.
Halfway down the stairs it got stuck. I thought for sure the piano, which was
much shorter than I, would fit. We had to push the heavy thing back out and put it instead
in our living room. We then decorated it for Christmas and put a Nativity scene in place
of the aquarium
 > >

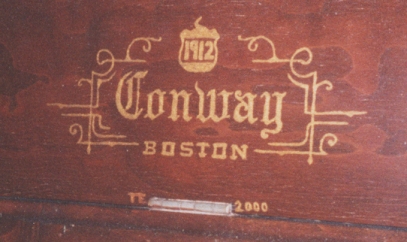
Fallboard in up position with new gold lettering |
Doing searches on the internet, I found out that Conway Co. went out of business long ago, but I also found
out that a piano studio/store is in the building the company used in Boston. Then I found a company
while surfing the net, that for $3 would tell you the year the piano was built using the serial number
and brand. From them I found out the piano was made in 1912! I wish I knew the history of it
from its creation up through the 1940's when the lady I bought it from saved it from the curb. Click here
for the email I received telling me about my piano.
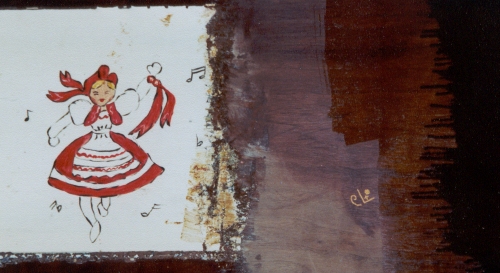
My official test board I still use, with some original artwork by the previous owner. |
In the summer of 2000, my twin boys were born. Talk about budget cuts! The project would have
to wait. Time was also an issue as an experienced parent can attest to. However, in the fall
I was able to finish the fallboard complete with gold lettering. At the time I stripped it of
its paint and stain, you could see the outlines of a decal that was once there. After finding no
reference on several websites that sold old piano decals, I filled it in best I could with gold
paint. Then I stained and varnished the fallboard. Stain does not cover painted wood, so the
gold shows through.

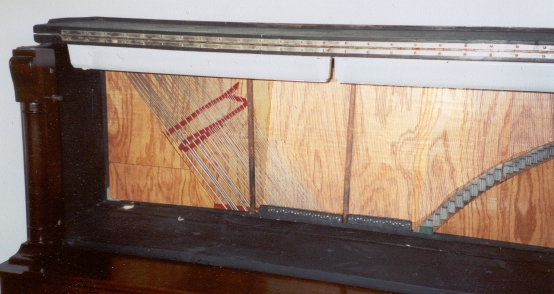
The background during its creation |
Christmas 2000 again had the piano servicing our Nativity scene, and with New Years ended another year
of slow progress. In the spring I was able to take some days off without kids to watch. This led to
a lot of work being done on the background I am making for the aquarium. Basically, when you look
through the aquarium, you will see the strings of the piano (that I saved) in a pattern very
similar to the way it really was. The back ground is removable as all the panels are so the future
aquarium can be installed and uninstalled at will. I am keeping in mind that someday I might
have to move this thing.
Behind the lower panel are the foot mechanisms that operate the electrical switches, this is where the wet/dry filter will be |
2001 has seen the most work being done since I finally got the piano apart in 1999.
I finished the background mid summer only to realize that it warped slightly when I tightened up the strings.
It was finally able to fit after some modifications involving some sawing and grinding.
Also, as the background was being finished up, work was completed on the bench.
I had to flip the seat because it was beyond repair.
I also was able to do several things in preparation of the aquarium like intall lights and drill holes for the plumbing.
By August, 2001 it was ready to host its tank.
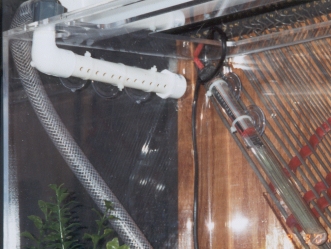
This is a close up of the aquarium shelf with lighting above and the strung background. |

The spray bar and heater shown in the tank, the hose leading to the bar will be hidden by reflection when filled. |
Phase 2 -- The Aquarium
Early in 2001, I regrettably lost my last grandma.
However, she will live on in my aquarium through the inheritance she gave me (no, not
a lot, but enough). In fact I am dedicating the aquarium to all my lost grandparents who
passed their abilities on to me through my parents, and also to my twins who I hope to do the same.
Anyway, enough emotion, on with the story!

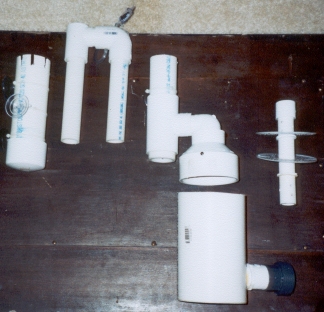
From the aquarium water is siphoned through the overflow and into a filter. |

A breakdown of the filter and overflow, poly-quilt-stuffing will be used for the actual filtration |
The tank was purchased from Tenecor, a company known for making custom aquariums for
zoos, movies, etc. I worked through Adams Aquatics a vendor of theirs
(and a great resource for fish lovers) here in Des Moines. Tenecor finished the tank in about 4 weeks
and then sent it to Adams. The aquarium is 48 inches long, 13 inches wide,
and 16 inches high. I figured out that it will hold 43 gallons and weigh about
360 lbs when filled. Cost was $369 with almost $100 of that in shipping and taxes.
I considered halving the price by making my own, but decided not to risk it.
The custom made wet/dry bio filter with pump. |
I built a custom made wet/dry filter that sits in the bottom of the piano. After the water
goes through the mechanical and chemical filter following the siphon from the tank,
it comes here. The sump of the filter is a plastic storage container and the bio media holder
is a wastebasket with holes punched into the bottom of it. The media consists of 3 gallons of
plastic shotgun shell wadding. These little plastic pieces have lots of surface area for bacteria
to live that filter the water of harmful toxins. I used the lid of the storage unit to construct
a drip plate to distribute the water and fashioned a splash guard out of some tupperware.
The pump is a Rio1700 that is set to pump around 225 gallons per hour and exits to the left.
On the right is the air pump that bubbles in the sump.

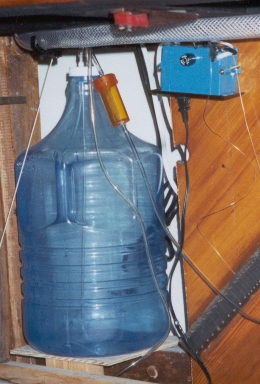
The top off system with the blue box holding the electronics of it, you can also see the return from the pump running near it. |
The top off system refills the tank as the water evaporates. I constructed a float switch
with a touch switch attached to a weighted float in the sump. When the water level decreases
enough, the switch is activated and turns on a air pump. The air pump then pumps air into
the 3 gallon resevoir jug and pushes water down its hose to the sump. I also hooked a small red
light into the system that lights up when the
air pump is running. If the reservoir runs dry, the light will stay on to indicate this. This
will help save the pump and my fish.

I decide to go with a fresh water tank due to my experience, time I have to monitor the tank,
and budget. I really wanted a reef salt water tank, but because of the 3 things I listed off
I went with the easier set up of fresh water. My parents gave us a good size pleco that was
starting to outgrow their 20 gallon, and we plan on getting 2 Oscars.
Although most experts would suggest a 55 gallon tank minimum(if not more)
for these 3 fish, I am going to see how it goes. The previous fish I had were kept in a 35
gallon: 13 inch female Oscar, 11 inch male Oscar, 8 inch Pleco. They seemed to do quite well
as I changed the water and cleaned the tank frequently. It will depend on their character.
If all else fails I will have to build a bigger aquarium. :)
Update
The aquarium with fish in it. |
Well we now have 2 Oscars and a Pleco in the tank.
The Pleco was given to me by my parents since it was close to out growing their tank.
The Oscars were bought after weeks of picky shopping.
They were the last 2 in the pet store's tank and they constantly swam with each other.
This is a good sign that they get along with each other and may even mate some day, especially since they were older already (3 inches in length).
I am estimating that they have grown 2 inches in the first 2 months we had them and they are always hungry.
We named them PB and J. The Pleco's name is Butter. :)
We had one leaking incident involving our physical filter.
Soon after we got the fish, the filter clogged and slowly leaked over a few days.
I replaced the filter medium, but the same thing happened to the new filter.
I believe this was due to myself overstuffing the filter and the fact that the surface tension of the water changed after adding fish (and their slime).
This increased surface tension slowed the water's ability to pass through the filter.
It is the only explanation I have for it working one week and not the next.
So, I now stuff the filter lightly and have added a guage to tell me the level of the water in the filter.
This way I can tell when a problem is near.
I also increased the overflow(of the filter) that had been unable to handle the previous problem.
I am planning on making some of my own acrylic tanks in the near future (an old TV and Mainframe terminal stand by).
To practice this, I will be making my own and replacing my previous custom made wet/dry filter.
The new one will be one self-contained piece and hold more water in it's sump.
This will allow for a faster flow rate and room for more error.
I also have a bust of Beethoven that a friend will be watersealing for me that will decorate the aquarium...
Phase 3 -- the piano
The last phase is to actually make it play again. I have reserved a large hollowed
out area under the tank shelf in the piano for an electric piano. When placed inside, the keys will be
in the right place. I have been looking at electric pianos that have the full 88 keys and play with
hammer feel. This is way in the future, as one of these costs about $1500 (although used prices continue
to drop below $1000). I have
also reserved the right foot pedal to be used in conjunction with the electric piano's
sustain pedal.
LINKS
I received an email from a guy who makes desks out of old pianos.
He also had trouble taking his first one apart, but says it gets easier. :)
The Upright Furniture Co.
I found out while searching the internet that my idea is not unique.
There were several online news articles about a man named Larry Plitz creating one in 1999.
Do note that I started on mine before this article. :)
I am sure mine is better anyway (hehe).
I have considered calling him to see if I could get a picture.
art announcement
I have also seen some references to piano aquariums on foreign sites and occassionally
find pages with weird poetry citing piano aquariums.
foreign
weird1
weird2
|