First open PSP and press the "new image" icon or do a File-New. That will bring up the following screen:
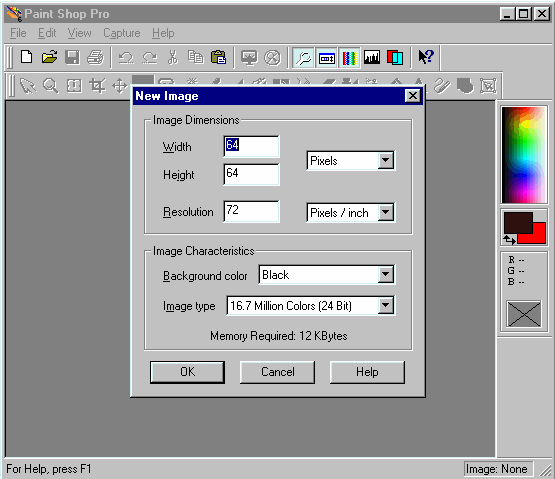
Change the settings as they are shown above and press OK. This should open up a new black image that is 64 by 64 pixels in size. Looking at the right is our foreground and background colors. Make white our foreground color by clicking the square and choosing white. Verify that the background color is black, if not make it so. It would be nice if our area was bigger to work with, so choose the magnify glass icon from the tool bar and click on our new image 3 times.
Now we need to find out how many pixels will represent our con at a given range in the site for the Fw190d-9. To do this we can use my Pixel Figurer. First we need to know the wingspans of our 2 enemy planes. The P-51 had a wingspan of about 37 feet and the B-17 had about 103 feet. Let's assume we want to range the P-51 at 300 yards and the B-17 at 600. Now follow the link and enter the information. It should look like this:
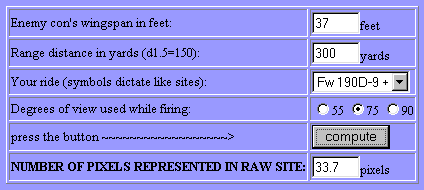
Since our gunsite is an even number wide (64), we want to stick with even numbers to keep everything centered. So for our Mustang we will use 34 pixels and for the Fort, 44. Now select the shape tool icon(red circle over a blue square). You may want to right click on it and choose "Tool Options" if tool options are not already shown. The next image shows the tool options open, make your choices the same as it:
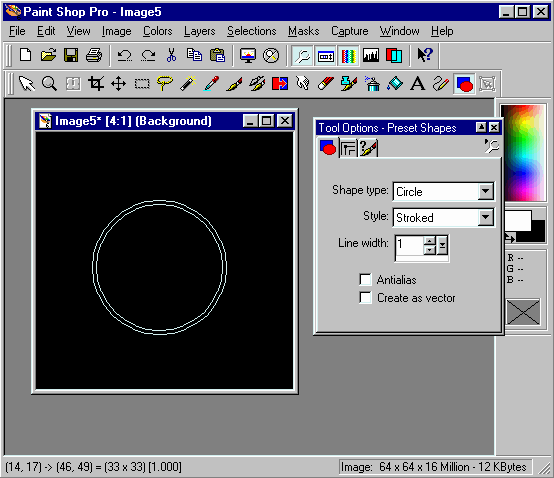
Now click and hold starting in the middle and moving the mouse outward to form your circle. Note at the bottom, PSP tells you the dimensions of your circle. We want a circle of diameter 34, but PSP for some reason increments through the odd numbers for small circles. So, go with 33, don't worry about being centered, we will do that later. Now we are going to edit the circle to make in our wanted 34 pixels wide. Highlite the right half of the circle using the highlite tool (dotted box) and by clicking and dragging a box open. Now put your mouse over the selected area and then click and hold while dragging the selected area over 1 pixel. Do the same for the upper half of the circle. This image shows the result:
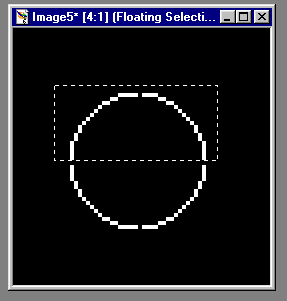
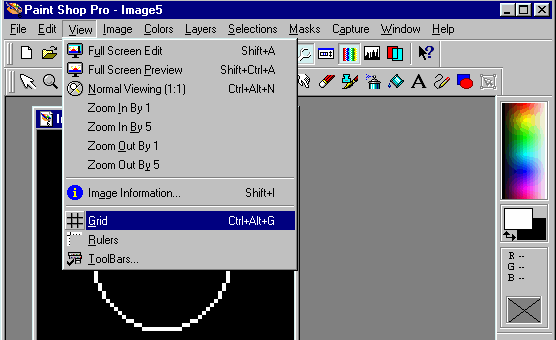
Now choose the paintbrush tool and using our tool options make sure it is set to 1 pixel in size. Using this tool we can touch up the gaps we just created in the circle. It will be useful to have a grid for the upcoming steps, so turn it on as demonstrated here:
Now we need to re-select our highlite tool and then open a box around our circle. Once our circle is surrounded by the dotted rectangle, click and drag the circle around the image and get it centered. Once that is done, click once outside the selected area to de-select our highlited area. Now do a soften on the image as shown here:
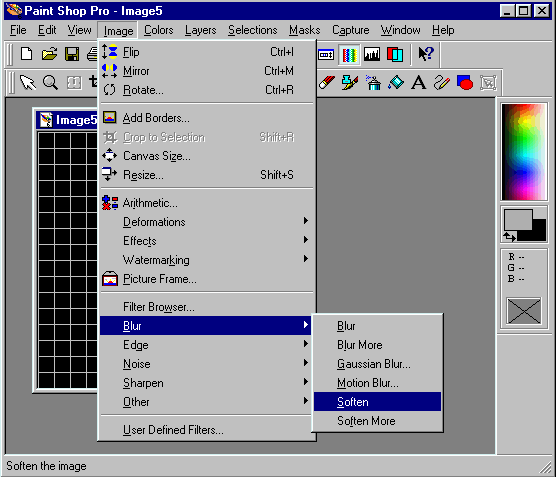
The result is shown in the next image. Now click on the eye-dropper tool. Guide it over the brightest point of our circle and do a left click. This should turn our foreground color to a grey and now our screen looks like this:
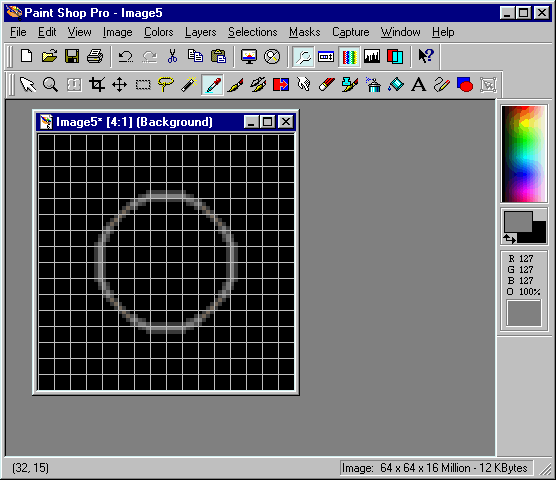
Now choose our line tool by clicking on the tool bar icon of a pencil drawing. Once again, I show the tool options for the line, you will want yours the same. Draw 4 lines, 2 lines/pixels wide coming out of the circle as shown here:
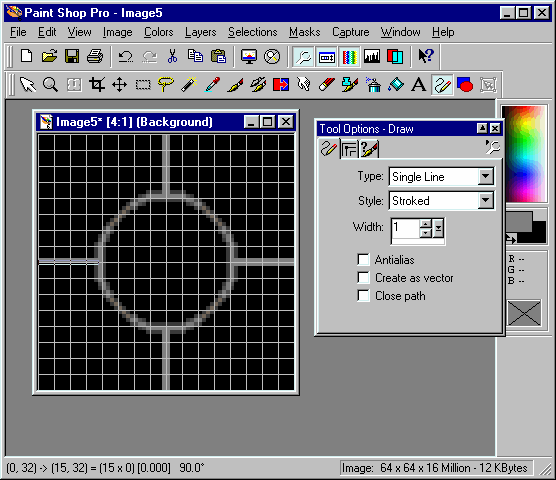
Then we need to zoom in with our magnify tool till one pixel represents one grid area. Using our paint brush tool, draw in our range bars for the B-17. Remember we need to span 44 pixels for the bomber. 64 minus 44 is 20, divided by 2 is 10. So starting 10 pixels from the edge and working left, I draw in my range indicator like this:

Do the same to the other side of our site. At this point you may want to save the image (possibly as a .gif file) in case we want to edit our mask that we have just created. Now we need to create another new image as we did above, except this time make the background color the color you want your site. In this example, I use red:
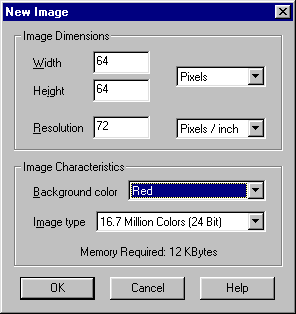
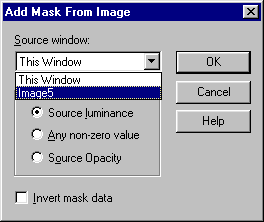
Then create a mask for our new image as demonstrated here:
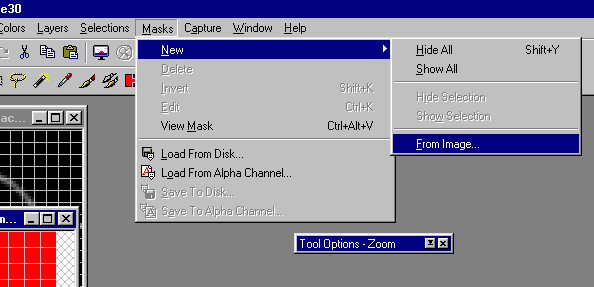
The following box will pop up. Use the list box to select the first image we created and press OK:
After you do this, our colored image should look somewhat like a gunsite. We need to save our alpha channel (mask) to the image like this:
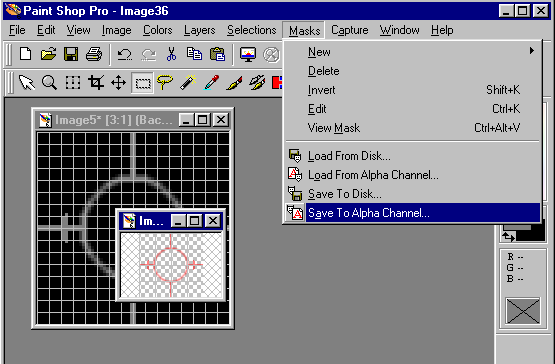
The following prompts pop up, click OK twice:

We are now ready to save our site. Choose File-Save As from the menu. The typical Windows save box appears. We need to change our "Save as type" selection to Truevision Targa (*.tga). Then click on options and make your choices as in this image:
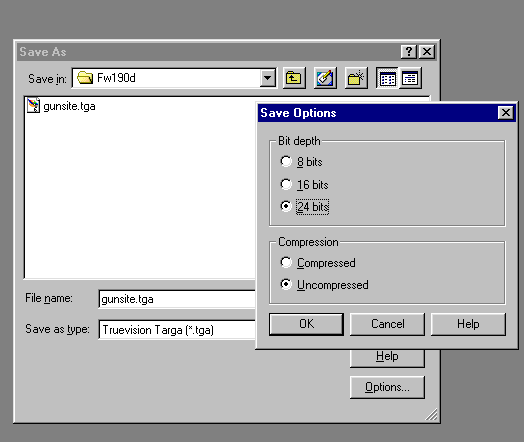
Click OK and then name your file gunsite.tga and save it in the following location:
C:\{YOUR WB3 FOLDER}\skins\fw190d\. You may get a warning about merging all layers, select OK if you do.
Now start WarbirdsIII and test our your site. You may need to tweak your site to get it exactly how you want. Perhaps add an aiming point once our bomber is ranged. I find it easiest to just edit the greyscaled mask and then re-create the tga file. Also, if this site is too dim for you, you can brighten it up. To do this, open your mask file and then do a Colors-Adjust-Brightness and Contrast. After you brighten it up, make sure to paint the background back to true black. Now, re-create your tga file and away you go.
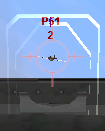
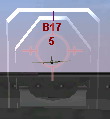
Here are 2 screenshots I took with our new site. Note that the distance to the cons are reported as d2 and d5. Since I am gaining on the con, I took the shot just as it changed from d3 to d2. This would be about 300 yards as d3 really indicates 300-399 yards.
